Building Durable Steps for Shed and Outdoor Use

Constructing Durable Steps for Sheds and Outdoor Applications

The construction of robust and long-lasting steps for shed access and other outdoor applications requires careful consideration of material selection, design, and construction techniques. This comprehensive guide outlines the essential steps involved in building durable steps that can withstand the rigors of outdoor exposure and frequent use.

Material Selection: The Foundation of Durability

The choice of materials significantly impacts the longevity and performance of your steps. Careful consideration should be given to factors such as weather resistance, load-bearing capacity, and aesthetic appeal. The following materials represent popular and effective choices for outdoor step construction:

Pressure-Treated Lumber: A Versatile Option

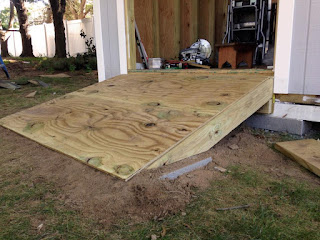
Pressure-treated lumber is a cost-effective and widely accessible material for building outdoor steps. The pressure-treatment process imbues the wood with preservatives, enhancing its resistance to rot, decay, insect infestation, and moisture damage. Commonly used species include Southern Yellow Pine and Douglas Fir. However, it is crucial to select lumber with a high level of pressure treatment, signified by a specific stamp or label from a reputable lumber supplier. Proper sealing with a high-quality exterior-grade sealant further extends its lifespan and enhances its aesthetic qualities.

Concrete: Unmatched Strength and Longevity

Concrete offers exceptional durability and strength, making it an ideal choice for high-traffic areas and locations subjected to harsh weather conditions. Concrete steps are virtually impervious to rot, decay, and insect damage, ensuring a long service life with minimal maintenance. However, constructing concrete steps requires more advanced skills and potentially specialized equipment. Careful consideration must be given to the design and reinforcement to ensure structural integrity and prevent cracking. The addition of pigments can enhance the aesthetic appeal of concrete steps.

Composite Materials: A Blend of Performance and Aesthetics

Composite decking materials, often composed of recycled plastic and wood fibers, represent a low-maintenance and attractive alternative to traditional lumber. These materials are highly resistant to rot, decay, insects, and moisture damage, offering comparable durability to pressure-treated lumber with reduced maintenance requirements. Composite materials come in a variety of colors and textures, enabling the construction of aesthetically pleasing and durable steps. However, composite materials can be more expensive than pressure-treated lumber.

Stone: Natural Elegance and Lasting Durability

Natural stone, such as granite, flagstone, or bluestone, offers exceptional durability, aesthetic appeal, and a timeless quality. Stone steps are exceptionally resistant to wear and tear, capable of enduring heavy use and harsh weather conditions for decades. However, stone steps are typically more expensive and labor-intensive to construct than other options. They also require skilled craftsmanship to ensure proper fitting and structural integrity. Proper bedding and jointing are critical for preventing shifting and water penetration.

Design Considerations: Ensuring Safety and Functionality

Careful planning and design are crucial for creating safe and functional steps. The following design elements should be considered:

Rise and Run: Optimizing Step Dimensions

The rise (vertical height) and run (horizontal depth) of each step must be carefully calculated to ensure comfortable and safe usage. A standard rise of 6-8 inches and a run of 10-12 inches is generally recommended, although these dimensions can be adjusted based on specific needs and site conditions. Maintaining consistent rise and run dimensions across all steps is paramount for preventing tripping hazards.

Number of Steps: Determining the Appropriate Height

The total number of steps is determined by the height difference between the ground level and the shed floor or platform. A greater height difference requires a larger number of steps, and vice-versa. It’s essential to ensure that the total height and the number of steps are appropriate for ease of access and comfort, minimizing the risk of falls.

Handrails and Guardrails: Enhancing Safety

For steps exceeding three or four risers, the inclusion of handrails or guardrails significantly enhances safety, particularly for older individuals or those with mobility limitations. Handrails should be securely affixed and positioned at a comfortable height for grasping. Guardrails should be constructed to prevent falls, with appropriate spacing between balusters to avoid trapping small children.

Landing Areas: Incorporating Rest Stops

For longer sets of steps, incorporating landing areas at intermediate points provides rest stops and reduces the risk of fatigue and falls. These landing areas should be sufficiently large to accommodate comfortable standing and turning.

Construction Techniques: Building for Longevity

The construction process must be meticulously executed to ensure the durability and longevity of the steps. The specific techniques will vary depending on the chosen material, but several common principles apply:

Foundation Preparation: Ensuring Stability

A solid and level foundation is essential for preventing settling and shifting of the steps over time. This may involve excavating the ground, compacting the soil, and installing a gravel base. For concrete steps, a reinforced concrete footing is critical for structural stability. For wooden steps, a well-prepared base of compacted gravel or concrete is necessary to prevent rot and ensure stability.

Framing and Support Structures: Providing Structural Integrity

Wooden steps typically require a robust framing system, utilizing pressure-treated lumber for stringers (support beams) and risers (vertical supports). Accurate cutting and assembly are crucial for ensuring consistent rise and run dimensions. Stringers should be securely anchored to the foundation and adequately supported to prevent sagging or deformation. Concrete steps typically involve the creation of forms to guide the placement and curing of the concrete.

Treads and Risers: Creating the Stepping Surface

Treads (horizontal stepping surfaces) and risers should be securely attached to the framing system, ensuring stability and preventing movement. For wooden steps, screws or bolts are generally used. For stone or concrete steps, appropriate adhesives and mortars are required to ensure a secure bond. The treads should be adequately sized to accommodate comfortable foot placement.

Finishing Touches: Protection and Aesthetics

Once the steps are constructed, appropriate finishing touches should be applied to enhance their durability and aesthetics. For wooden steps, this may involve applying a high-quality exterior-grade sealant or paint. For concrete steps, sealing can prevent staining and enhance durability. Stone steps may require sealing to prevent water penetration and staining.

Regular Maintenance: Ensuring Long-Term Performance

Regular maintenance is essential for ensuring the longevity and safety of your outdoor steps. This includes inspecting for damage, repairing any cracks or loose components, and reapplying sealant or paint as needed. Regular cleaning will also help prevent the accumulation of debris and maintain the aesthetic appearance of the steps. Promptly addressing any issues will help prevent further damage and ensure that your steps remain safe and functional for many years to come.

By carefully considering material selection, design, and construction techniques, you can build durable and long-lasting steps that provide safe and convenient access to your shed or other outdoor areas for years to come. Remember that safety should always be the primary concern, and meticulous attention to detail is crucial throughout the entire process.

Share:

DIY Shed Steps with Non-Slip Features for Safety

Building Safe & Sturdy Shed Steps: A DIY Guide

So, you've got a fantastic new shed, but accessing it feels like scaling a small mountain? Don't worry, you're not alone! Many shed owners find themselves needing a little extra help getting up and down. Building your own set of steps is a surprisingly straightforward project, and adding non-slip features will ensure safety for years to come. This guide will walk you through the whole process, from planning to finishing touches, in a way that’s easy to understand, even if you’re a DIY newbie.

Planning Your Shed Steps: Measure Twice, Cut Once (Seriously!)

Before you even think about grabbing a saw, careful planning is key. Rushing this part will only lead to headaches (and potentially wobbly steps!).

Measuring Your Shed's Height and Distance

The first step (pun intended!) is to accurately measure the height from the ground to your shed's entrance. Use a measuring tape and make sure the surface you're measuring from is level. Next, measure the horizontal distance from where you want the steps to begin to the shed's base. This will determine the overall length of your steps.

Choosing Your Step Rise and Run

This is where things get slightly more technical, but don’t worry; it's manageable. The “rise” is the vertical height of each step, and the “run” is the horizontal depth. A comfortable and safe ratio is around a 7-inch rise and an 11-inch run. However, you can adjust this slightly based on your measurements and personal preference. Just make sure to maintain a consistent rise and run for every step for evenness and safety. Too steep, and you’ll be constantly battling gravity; too shallow, and you'll need an unnecessarily long staircase.

Determining the Number of Steps

Once you have your rise and run, you can calculate the number of steps needed. Divide the total height of your shed access by your chosen rise. Round up to the nearest whole number â€" you can't have a fraction of a step! This will give you the total number of steps required.

Choosing Your Materials

You have options here, and the best choice depends on your budget and aesthetic preferences.

  • Pressure-treated lumber: This is a popular and affordable option, offering good durability and resistance to rot and insects.
  • Cedar or redwood: These are naturally rot-resistant and add a beautiful, rustic touch but come with a higher price tag.
  • Composite decking: This offers low maintenance and excellent durability, but it's also generally more expensive than lumber.

Remember to factor in the cost of screws, non-slip materials (more on that later!), and any other hardware you might need.

Building Your Shed Steps: A Step-by-Step Guide

With your planning complete, let’s get building!

Cutting the Lumber

Using your measurements and the number of steps calculated, cut your lumber to the correct lengths for the risers (vertical pieces) and treads (horizontal pieces). Always use a sawhorse or workbench for safety and accuracy. A miter saw is ideal for clean, precise cuts, but a hand saw will work too if that's what you have available.

Assembling the Steps

Start by laying out your first tread. Attach the risers to the ends of the tread using appropriate screws. Make sure the risers are plumb (perfectly vertical) and secure. Repeat this process for each step, ensuring that each step is level and aligned with the others. You can use a level to check this throughout the construction process to maintain evenness.

Attaching the Stringers (Optional but Recommended)

Stringers are the support beams that run along the sides of your steps, providing extra strength and stability. They are a good idea, particularly for longer staircases. Cut the stringers to the correct length, ensuring they align with the top and bottom of the stairs. Attach them securely to your steps and to the ground (using posts set in concrete for best stability).

Adding Non-Slip Features: Safety First!

This is crucial! No matter how beautifully built your steps are, they're useless if they're slippery. Here are several effective non-slip options:

Non-Slip Tape

This is a budget-friendly and quick solution. Choose a high-quality, outdoor-rated tape designed for stairs. Apply it carefully according to the manufacturer’s instructions, ensuring complete coverage on the treads.

Non-Slip Paint

Similar to tape, non-slip paint adds an extra layer of grip to your steps. Make sure to choose a paint specifically formulated for outdoor use and follow the instructions carefully for best results. You may need multiple coats for optimal texture.

Non-Slip Rubber Matting

This is a more durable option and offers excellent grip, especially in wet conditions. You can cut rubber matting to fit your treads or find pre-cut pieces. Secure the matting with construction adhesive for a permanent solution.

Textured Wood

If you are comfortable with using a router or specialized wood shaping tools, you can create a textured surface on the treads to improve grip. This adds a higher level of aesthetic appeal as well as improved traction. Always take safety precautions when operating power tools.

Finishing Touches: Making it Look Great

Once your steps are built and the non-slip features are in place, it’s time to add those finishing touches.

Sanding and Staining (Optional)

Sanding your steps will create a smooth surface and remove any splinters. If you’re using wood, staining or painting will protect the wood from the elements and enhance the look of your steps. Always choose products suitable for outdoor use.

Handrail (Highly Recommended)

For extra safety, particularly if your steps are tall or steep, consider adding a handrail. This will provide support and help prevent falls. Make sure it’s securely fastened and meets relevant building codes.

Ground Level Preparation

Before installing the stairs, ensure the ground is level and compacted. Consider adding gravel or a stone base for drainage and stability. This ensures a solid and even foundation for your steps.

Commonly Asked Questions

Q: How long does it take to build shed steps?

A: The time it takes depends on your experience level and the complexity of the design. For a simple set of steps, you can likely complete the project in a weekend. More complex designs might take longer.

Q: Do I need any special tools?

A: A measuring tape, saw (circular saw or hand saw), drill, screwdriver, level, and possibly a router (depending on the non-slip method chosen) are essential.

Q: How much does it cost to build shed steps?

A: Costs vary depending on the materials you choose. You can expect to spend anywhere from $50 to $200 or more depending on the project size and the type of wood you choose to use.

Q: How do I ensure my steps are safe and compliant with codes?

A: Check local building codes for specific requirements in your area. Focus on creating a consistent rise and run, using sturdy materials, and incorporating non-slip features. A handrail is also a great addition for safety.

Q: Can I build steps if I have no DIY experience?

A: With careful planning and a step-by-step approach, building shed steps is a manageable project for beginners. However, if you're uncomfortable with any aspect, it's always best to seek assistance from someone with more experience or consider hiring a professional.

Remember, safety is paramount. Take your time, follow the instructions carefully, and don’t hesitate to ask for help if needed. Happy building!

Share:

How to Add Cedar Shingles to Your DIY Shed Project

Adding Cedar Shingles to Your DIY Shed: A Step-by-Step Guide

Building your own shed is a rewarding experience, and adding cedar shingles elevates the project from functional to fantastic. Cedar's natural beauty and durability offer a classic, timeless look that will enhance your property for years to come. This guide provides a detailed walkthrough, ensuring you achieve a professional-looking finish.

Planning and Preparation: Laying the Foundation for Success

Before you even think about nailing the first shingle, meticulous planning is essential. Measure your shed's roof carefully, accounting for overhangs and any variations in slope. This precise measurement dictates the number of shingles you'll need. Don't underestimate! Purchase at least 10% extra to account for waste and potential errors. Next, gather your tools: a shingle hatchet, hammer, roofing nails, chalk line, measuring tape, safety glasses, and work gloves. Finally, prepare your roofing surface. Ensure it's clean, dry, and free of any debris that could compromise the shingle adhesion.

Choosing the Right Shingles

Cedar shingles come in various grades and thicknesses. Higher-grade shingles offer superior durability and aesthetics but come at a higher price. Consider your budget and desired lifespan when making your selection. Thickness influences the overlap and the overall longevity of your roof. Thicker shingles offer better protection against the elements.

Installing the Underlayment: A Crucial First Step

Before applying the shingles, install an underlayment. This waterproof barrier protects your shed from leaks, acting as an extra layer of security. Start at the bottom edge of the roof, overlapping each sheet according to the manufacturer's instructions. Secure the underlayment with roofing staples, ensuring a tight, wrinkle-free installation. This meticulous step pays off in the long run, preventing costly water damage.

Installing the Cedar Shingles: A Detailed Process

Begin installing shingles at the lowest point of the roof, working your way upwards. Use a chalk line to establish a straight starting line for the first course. This ensures a neat and uniform look. Each shingle should be nailed with two nails near the top third, allowing for proper overlap. Maintain a consistent overlap between each row, typically around 4-6 inches, depending on shingle thickness. Use the shingle hatchet to trim any excess shingle that extends beyond the roofline.

Working with Hip and Ridge Shingles

Hips and ridges require special attention. Use pre-cut hip and ridge shingles, or cut standard shingles to fit. These require precise cuts and careful placement to ensure a watertight seal at these critical points. Take your time, and don't hesitate to consult online resources or videos for guidance.

Finishing Touches: Ensuring Durability and Aesthetics

Once all the shingles are in place, inspect the entire roof for any loose shingles or gaps. Address any issues immediately. A final walk-around lets you appreciate your hard work and verify the roof's integrity. Consider adding drip edge flashing along the edges of the roof to further prevent water damage. This step safeguards your investment and maximizes the longevity of your beautiful new cedar shingle roof.

Maintaining Your Cedar Shingle Roof

Cedar shingles, while durable, require periodic maintenance. Regularly inspect the roof for damage and address any problems promptly. Consider cleaning the roof with a soft-bristled brush and mild detergent to remove dirt and debris. Protecting your investment with a cedar shingle treatment will significantly increase the life of your beautiful new shed roof.

Share:

DIY Cedar Shed: A Stylish and Functional Outdoor Structure

DIY Cedar Shed: A Stylish and Functional Outdoor Structure

Transform your backyard into a haven of organization and style with a handcrafted cedar shed. This detailed guide empowers you to build a beautiful and functional structure that perfectly complements your outdoor space. Forget overpriced, pre-fabricated sheds; embrace the satisfaction of creating something truly unique and tailored to your needs. We'll walk you through each step, from planning and design to construction and finishing touches, making this ambitious project achievable for even moderately experienced DIYers.

Planning Your Cedar Shed: Size, Style, and Location

Before you even pick up a saw, meticulous planning is key. Consider the shed's primary function. Will it house gardening tools, store outdoor furniture, or serve as a workshop? This dictates its size and internal layout. Sketch your ideal shed, noting dimensions, door placement, and window locations. Choose a style that harmonizes with your home's architecture. A classic A-frame design offers timeless appeal, while a gambrel roof adds a touch of elegance. Research local building codes and obtain necessary permits before starting construction. Finally, select a location with good drainage, level ground, and easy access.

Choosing the Right Cedar

Western Red Cedar is a popular choice for outdoor structures due to its natural resistance to rot, insects, and decay. Its beautiful reddish-brown hue adds warmth and sophistication. Consider the grade of cedar â€" higher grades offer fewer knots and imperfections, resulting in a cleaner, more polished finish. Calculate the lumber requirements based on your plans. Purchase additional lumber to account for potential cuts and mistakes. Remember to factor in materials for the roof, foundation, and any internal shelving or fixtures.

Building Your Cedar Shed: A Step-by-Step Guide

With your plans finalized and materials gathered, the construction begins. We recommend starting with a robust foundation; consider a concrete slab for ultimate stability or pressure-treated lumber for a more budget-friendly option. Next, erect the shed's frame using pressure-treated lumber for the base and cedar for the visible framing. Precise measurements and careful joinery are crucial here. Utilize appropriate fasteners â€" galvanized screws are ideal for outdoor applications. Always double-check your work as you go to ensure everything aligns perfectly. Installing the roof is a significant step; carefully position and secure the rafters, sheathing, and roofing felt before adding your chosen roofing material, such as asphalt shingles or metal roofing.

Adding the Finishing Touches

Once the structure is complete, it's time to focus on aesthetics and functionality. Install the doors and windows, ensuring they function smoothly and securely. Consider adding features like cedar siding for a cohesive look, decorative trim, and a weather vane for a charming touch. Finish the interior with shelving or workbenches, tailored to your specific needs. Apply a high-quality, weather-resistant sealant to protect the cedar from the elements, preserving its beauty for years to come. Finally, add a final coat of stain or paint to achieve your desired aesthetic and enhance protection against weathering.

Maintaining Your Cedar Shed for Lasting Beauty

Regular maintenance ensures your cedar shed remains a functional and attractive addition to your property. Inspect the structure annually for any signs of damage, and address minor repairs promptly. Reapply a protective sealant every few years to maintain water resistance and prevent rot. Clean the shed regularly to remove debris and prevent mold growth. With proper care, your DIY cedar shed will stand as a testament to your craftsmanship and provide years of enjoyment.

Tips for Long-Term Care

  • Clean gutters and downspouts regularly to prevent water damage.
  • Inspect the foundation for settling or cracks.
  • Check for loose screws or damaged boards and tighten or replace as needed.
  • Consider investing in a shed cover during the harshest winter months.

Building your own cedar shed is a rewarding experience that adds significant value to your property while satisfying your DIY aspirations. By carefully planning, following these steps, and maintaining your structure, you'll enjoy a beautiful and functional outdoor space for years to come.

Share:

DIY Outdoor Shed Steps for Beginners

Constructing Durable and Aesthetically Pleasing Outdoor Shed Steps: A Beginner's Guide

Accessing an elevated outdoor shed often necessitates the construction of steps for safe and convenient entry. This comprehensive guide provides a step-by-step approach for beginners to build sturdy and visually appealing shed steps, emphasizing safety and practicality throughout the process. The instructions are designed for individuals with limited carpentry experience, prioritizing clarity and ease of understanding.

Phase 1: Planning and Preparation

Assessing the Site and Determining Dimensions

Before commencing construction, a thorough site assessment is crucial. This involves accurately measuring the height difference between the ground level and the shed floor. This measurement will dictate the number of steps required. A comfortable rise (vertical height of each step) is typically between 6 and 8 inches. The run (horizontal depth of each step) should be approximately 10 to 12 inches. Calculate the total rise and divide by the desired rise per step to determine the number of steps needed. For example, a 30-inch rise with a 7-inch rise per step will require approximately 4.3 steps; round up to 5 steps for safety and consistency. Ensure adequate space is available for the steps, allowing for comfortable passage and adherence to local building codes regarding minimum clearances.

Gathering Necessary Materials

The following materials are essential for constructing sturdy and long-lasting shed steps:

  • Pressure-treated lumber: Choose durable, rot-resistant lumber suitable for outdoor use. Pressure-treated pine or cedar are excellent choices. The quantity will depend on the dimensions calculated in the previous step. Ensure you purchase lumber with minimal warping or defects.
  • Concrete mix: Concrete will be used to create a stable foundation for your steps. The amount required will depend on the dimensions of your step base. Follow the instructions on the concrete mix bag for accurate proportions.
  • Construction-grade adhesive: This will enhance the structural integrity of the steps by bonding the lumber components.
  • Exterior-grade screws: Galvanized or stainless steel screws are recommended to resist rust and corrosion. Choose appropriately sized screws based on the thickness of your lumber.
  • Level: A sturdy level is critical to ensure the steps are properly aligned and safe to use.
  • Measuring tape: Accurate measurements are vital for precise construction.
  • Shovel: For digging and preparing the foundation.
  • Post hole digger (optional): This can simplify the process of digging the foundation holes, especially in hard soil.
  • Safety glasses and work gloves: Essential personal protective equipment to protect against injuries.

Preparing the Construction Site

Before beginning the construction process, carefully prepare the site. Clear the area of any debris, vegetation, or obstacles that might interfere with construction. Mark the location of the steps using string or stakes, ensuring they are level and aligned with the shed entrance. The area where the foundation will be situated should be levelled and compacted to provide a stable base.

Phase 2: Foundation Construction

Creating a Stable Base

A robust foundation is paramount for the longevity and safety of the shed steps. Dig a trench approximately 6 to 8 inches deep along the length of the planned steps. The width of the trench should accommodate the width of your planned steps plus a few inches on each side for concrete support. Compacting the base of the trench is crucial to prevent settling. A layer of gravel can be added for improved drainage.

Pouring and Curing the Concrete

Follow the instructions on your concrete mix packaging regarding mixing ratios. Mix the concrete thoroughly to ensure a consistent consistency. Pour the concrete into the trench, ensuring it's evenly distributed and fills the trench completely. Use a shovel or trowel to level the surface of the concrete. Allow the concrete to cure completely, typically 24-72 hours, before proceeding to the next phase. This allows the concrete to achieve its full strength.

Phase 3: Constructing the Steps

Cutting and Assembling the Step Risers and Treads

Once the concrete foundation has cured, begin constructing the steps themselves. Cut the lumber according to your predetermined dimensions for the risers (vertical pieces) and treads (horizontal pieces). The risers should be cut to the height you determined in the planning phase, while the treads should be cut to the run. Using the construction adhesive, securely attach the risers and treads to one another, ensuring a snug fit and strong bond. Pre-drill pilot holes before driving in the screws to prevent splitting the wood.

Attaching the Steps to the Foundation

Carefully position the assembled steps onto the cured concrete foundation, ensuring they are level and aligned. Use a level to verify alignment and make any necessary adjustments. Secure the steps to the concrete foundation using appropriate fasteners or methods ensuring that the steps are firmly anchored to prevent movement or shifting. This might involve drilling into the concrete using appropriate anchors or employing other suitable anchoring techniques.

Finishing Touches

Once the steps are securely attached, apply a finishing touch. Sand any rough edges or splinters to prevent injuries. Consider applying a weather-resistant sealant or stain to protect the wood from the elements and enhance its longevity. This will help to maintain the aesthetics and extend the lifespan of the steps. Regular maintenance, including cleaning and occasional resealing, will ensure the steps remain safe and attractive.

Phase 4: Safety and Maintenance

Regular inspection and maintenance are essential to ensure the steps remain safe and functional. Regularly check for loose screws, damaged wood, or any signs of deterioration. Tighten loose screws immediately, replace damaged lumber promptly, and reapply sealant as needed. Always ensure the steps are clear of debris, snow, or ice, especially during inclement weather to prevent slips and falls. The addition of handrails can further enhance safety, particularly for older individuals or those with mobility challenges.

By following these detailed instructions, even beginners can successfully construct durable and aesthetically pleasing outdoor shed steps. Remember to prioritize safety throughout the entire process, utilize appropriate personal protective equipment, and carefully follow all instructions to create a functional and safe access point to your shed.

Share:

Free DIY Shed Plans with Cedar Shingle Roofing Guide

Build Your Dream Shed: Free DIY Plans & Cedar Shingle Roofing Guide

Tired of cluttered garages and overflowing storage spaces? Dreaming of a beautiful, functional shed to house your tools, garden equipment, or even a cozy workshop? Then you've come to the right place! This comprehensive guide provides free DIY shed plans and a detailed walkthrough of installing a stunning cedar shingle roof. We'll equip you with the knowledge and confidence to build a shed you'll be proud of, all while saving money by tackling the project yourself.

Choosing the Right Shed Plan for You

Before you grab your hammer, carefully consider your needs. What will you store in your shed? How much space do you require? Think about the overall aesthetic you desire â€" a rustic charm or a more modern look? Luckily, numerous free shed plans are available online, catering to various sizes and styles. Websites like [Insert reputable website examples here] offer downloadable blueprints, often including material lists and step-by-step instructions. Remember to carefully review all plans before starting construction, ensuring they align perfectly with your vision and local building codes.

Factors to Consider When Selecting a Plan:

  • Size and dimensions: Measure your available space carefully and choose a plan that fits comfortably.
  • Foundation type: Consider concrete slabs, gravel bases, or pressure-treated lumber for your shed's foundation.
  • Roof style: Gable, shed, or hip roofs each offer unique advantages in terms of appearance and structural integrity.
  • Door and window placement: Plan for easy access and natural light.

Installing a Majestic Cedar Shingle Roof

A cedar shingle roof adds undeniable charm and longevity to any shed. This natural material provides excellent weather protection and ages beautifully, developing a rich, silvery patina over time. However, installing a cedar shingle roof requires precision and attention to detail. Begin by preparing the roof sheathing, ensuring it's perfectly level and free from any imperfections. This forms the foundation for your shingles, ensuring a long-lasting and aesthetically pleasing result.

Step-by-Step Cedar Shingle Installation:

  • Start with the starter course: This layer ensures a neat and even beginning for the rest of the shingles.
  • Apply the shingles: Follow the manufacturer’s instructions regarding shingle overlap and spacing for optimal weather resistance.
  • Maintain consistent spacing: Even spacing contributes to a beautiful and uniform appearance.
  • Cut and fit shingles around obstructions: Precise cutting is essential for a professional finish.
  • Install ridge caps: These complete the roofline, protecting the ridge from weather damage.
  • Seal all exposed nail holes and edges: This will prevent water penetration and extend the life of your roof.

Essential Tools and Materials

Before starting, gather all necessary tools and materials. This ensures a smooth and efficient building process. For the shed construction, you’ll need basic carpentry tools like a hammer, saw, drill, level, and measuring tape. For the cedar shingle roof, you'll additionally require a shingle hatchet or knife, roofing nails, and possibly a nail gun for faster installation. Create a detailed material list based on your chosen shed plans to avoid unnecessary trips to the hardware store. Remember to account for extra materials to accommodate for potential mistakes or cuts.

Safety First!

Building a shed can be a rewarding experience, but safety should always be your top priority. Always wear appropriate safety gear, including safety glasses, work gloves, and sturdy footwear. When working at heights, use proper fall protection equipment. Follow all manufacturer instructions for tools and materials, and never hesitate to seek assistance when needed. Remember, a safe and well-planned project leads to a beautiful and functional shed you can enjoy for years to come.

Share:

DIY Shed with Cedar Shingles: Step-by-Step Guide

Constructing a DIY Shed with Cedar Shingles: A Comprehensive Guide

This comprehensive guide details the process of building a durable and aesthetically pleasing shed using cedar shingles. It is intended for individuals with intermediate DIY skills and a willingness to dedicate significant time and effort to the project. Safety precautions should be observed at all times, and appropriate personal protective equipment (PPE) should be worn throughout the construction process.

Phase 1: Planning and Preparation

1.1 Site Selection and Preparation:

Careful site selection is paramount. Choose a level location with good drainage to prevent water accumulation around the shed's foundation. Consider proximity to power sources and potential obstructions such as overhanging branches or underground utilities. Clear the area of vegetation, debris, and any obstacles. Mark the shed's dimensions using stakes and string to ensure accurate placement.

1.2 Foundation Construction:

The foundation provides stability and protects the shed from moisture. Several options exist, including:

  • Concrete Slab: Offers the most robust and durable foundation, requiring professional pouring or meticulous DIY execution. Ensure proper grading and reinforcement.
  • Gravel Base: A simpler and less expensive option. Involves creating a compacted gravel bed several inches deep, providing adequate drainage. Suitable for lighter sheds.
  • Pressure-Treated Lumber Base: A cost-effective alternative, using pressure-treated lumber to create a frame upon which the shed sits. Requires proper treatment to prevent rot and insect infestation.

Regardless of the chosen method, ensure the foundation is level and plumb before proceeding.

1.3 Material Acquisition and Cutting:

Acquire all necessary materials, including pressure-treated lumber for the frame, cedar shingles, roofing felt, nails, screws, and any additional hardware. It is recommended to create a detailed materials list beforehand based on your chosen shed design. Accurate cutting of lumber is crucial for a structurally sound shed. Utilize a miter saw or circular saw with a sharp blade for precise cuts. Always wear appropriate safety glasses and hearing protection.

Phase 2: Frame Construction

2.1 Building the Floor Frame:

Construct the floor frame using pressure-treated lumber, ensuring all members are properly aligned and secured with galvanized nails or screws. Employ appropriate joinery techniques, such as dado joints or mortise and tenon joints, for added strength. The floor frame should be level and square, forming a stable base for the walls.

2.2 Erecting the Walls:

Construct the wall frames by cutting and assembling the vertical and horizontal studs. Use appropriate bracing to maintain squareness during assembly. Ensure proper spacing between studs according to local building codes and your chosen wall sheathing. Check for plumbness regularly using a level.

2.3 Roof Framing:

The roof framing involves constructing the rafters, which support the roofing material. Calculations for rafter length and angles are crucial and can be simplified using online calculators or specialized software. Ensure proper spacing and secure fastening of the rafters to the wall plates. Install ridge boards to complete the roof frame. Choose a roof design that suits your needs and aesthetic preferences (e.g., gable, shed, hip).

Phase 3: Exterior Sheathing and Shingle Installation

3.1 Wall Sheathing:

Apply exterior sheathing to the wall frames, providing a solid surface for the cedar shingles. Use plywood or OSB (oriented strand board) that meets building codes. Ensure proper fastening and alignment of the sheathing panels. Caulk any gaps or seams to prevent air infiltration and moisture penetration.

3.2 Underlayment Installation:

Before installing the cedar shingles, apply roofing felt (or another suitable underlayment) to the roof. This waterproof layer protects the shed from rain and snow. Overlap the felt according to the manufacturer’s instructions, ensuring complete coverage.

3.3 Cedar Shingle Installation:

Cedar shingle installation requires patience and attention to detail. Begin by establishing a consistent starter course at the bottom of the roof. Follow the manufacturer’s recommended shingle exposure and overlap patterns. Use galvanized roofing nails to secure the shingles, avoiding overdriving which can cause splitting. Maintain consistent spacing and alignment for a professional finish. Consider using a shingle gauge to maintain uniformity.

Phase 4: Finishing Touches

4.1 Door and Window Installation:

Install the door and window units, ensuring proper framing and sealing to prevent drafts and leaks. Use weather stripping for added insulation and protection against the elements. Check for proper alignment and operation.

4.2 Trim and Finishing:

Install trim around doors, windows, and roof edges for a finished look. Caulk all seams and joints to prevent water infiltration. Consider painting or staining the shed's exterior for added protection and aesthetic appeal. Select a weather-resistant paint or stain designed for exterior use.

4.3 Final Inspection:

Conduct a thorough inspection of the completed shed, checking for any loose nails, gaps, or other imperfections. Address any issues before declaring the project complete. Ensure the shed is structurally sound and weatherproof. Consider adding additional features such as shelving, electrical outlets (following relevant codes), or a workbench to enhance its functionality.

Disclaimer: This guide provides general information and should not be considered a substitute for professional advice. Consult local building codes and regulations before commencing construction. Always prioritize safety and employ appropriate safety measures throughout the project.

Share:

Postingan Populer

Powered by Blogger.

Recent Posts