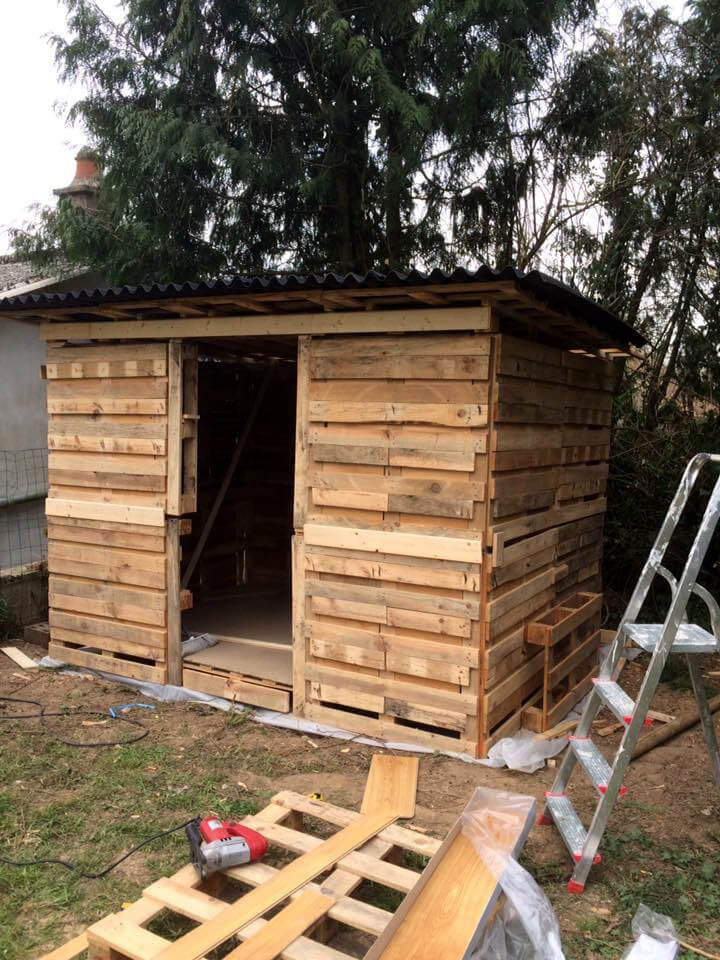
How to Create a Pallet Shed DIY: Simple Materials, Big Results
Constructing a functional and aesthetically pleasing shed from repurposed pallets presents a cost-effective and environmentally conscious alternative to purchasing a pre-fabricated structure. This detailed guide will equip you with the knowledge and steps necessary to successfully undertake this DIY project, transforming readily available materials into a valuable addition to your property.
Phase 1: Planning and Preparation
Before embarking on the construction process, meticulous planning is crucial to ensure the project's success. This initial phase encompasses several key steps, each contributing significantly to the overall outcome.
Site Selection and Assessment
The first step involves selecting a suitable location for your pallet shed. Consider factors such as: proximity to existing utilities (electricity, water), accessibility for material delivery and construction, ground conditions (levelness, drainage), and compliance with local building regulations and zoning laws. Proper site preparation, including leveling the ground and ensuring adequate drainage, is essential for a stable and long-lasting structure. A level site prevents future settling and potential structural problems.
Material Acquisition and Inspection
Sourcing pallets requires careful consideration. Prioritize pallets made from durable, untreated wood, as these offer better resistance to the elements. Inspect each pallet for damage, rot, or infestation. Discard any showing signs of significant deterioration. Determine the quantity required based on your desired shed dimensions. A thorough inspection at this stage significantly reduces potential issues during construction.
Design and Dimensioning
Develop a detailed plan outlining the shed's dimensions, including height, width, and depth. Consider factors such as intended use and the amount of storage space required. Sketching a basic design, including door and window placement, provides a visual guide throughout the construction process. Accurate measurements are paramount for ensuring structural integrity and a well-fitting structure.
Tool and Equipment Gathering
Assemble the necessary tools and equipment before commencing construction. This list may include, but is not limited to:
- Measuring tape and level
- Hammer and pry bar
- Circular saw or hand saw
- Drill and assorted drill bits
- Screwdriver (or impact driver)
- Safety glasses and work gloves
- Shovel (for ground preparation)
- Post hole digger (if using posts for support)
- Concrete mix (if using concrete footings)
- Wood sealant or preservative
Ensure all tools are in good working order and safety equipment is worn at all times.
Phase 2: Construction
The construction phase involves assembling the pallet components into a complete shed structure. Careful attention to detail and adherence to the established plan are crucial for a structurally sound and aesthetically pleasing result.
Foundation Preparation
Begin by preparing a level foundation. This could involve creating a simple gravel base, a concrete slab, or using pressure-treated lumber for a raised foundation. The chosen foundation method depends on the soil conditions and the desired shed's permanence.
Pallet Disassembly and Preparation
Carefully disassemble the pallets, removing any loose or damaged components. Clean the reclaimed wood, removing any dirt, debris, or nails that might compromise structural integrity. Sort and organize the reclaimed wood by length and condition for efficient construction.
Framing and Wall Construction
Construct the shed's frame using the prepared pallets. This might involve creating a simple rectangular structure, possibly incorporating additional framing for added strength and stability. Secure the pallets using appropriate fasteners, ensuring alignment and even spacing. Consider using metal corner brackets for additional reinforcement at joints.
Roof Construction
The roof construction is a crucial aspect of the shed's weather resistance. Simple designs utilize a gable or shed roof. Ensure proper overlap for waterproofing. Secure the roofing material (e.g., tarps, corrugated metal, asphalt shingles) according to the manufacturer's instructions. Adequate slope is crucial for water runoff.
Door and Window Installation
Install a door and window (if desired), ensuring secure fastenings and proper weather sealing. Consider using recycled materials or repurposed windows and doors whenever possible to maintain the project's sustainable nature. A properly fitted door is vital for security and weather protection.
Phase 3: Finishing Touches and Maintenance
Once the core structure is complete, the final phase focuses on refining the shed's aesthetics and ensuring its longevity.
Exterior Finishing
Apply a suitable wood sealant or preservative to protect the wood from the elements and extend its lifespan. This step significantly enhances the shed's durability and weather resistance. Choose a sealant compatible with the type of wood used in construction.
Interior Finishing
Optional interior finishing might involve painting the interior walls or adding shelves and other organizational features. Consider using environmentally friendly paints and finishes whenever possible.
Ongoing Maintenance
Regular inspection and maintenance are vital for extending the lifespan of your pallet shed. This includes checking for signs of damage, repainting as needed, and addressing any structural issues promptly. Regular cleaning and maintenance significantly prolong the shed’s service life.
Building a pallet shed is a rewarding project that combines practicality, sustainability, and creativity. By following these guidelines, you can transform readily available materials into a functional and aesthetically pleasing addition to your property. Remember safety is paramount throughout the entire process; always wear appropriate safety gear and follow all relevant safety regulations.


No comments:
Post a Comment